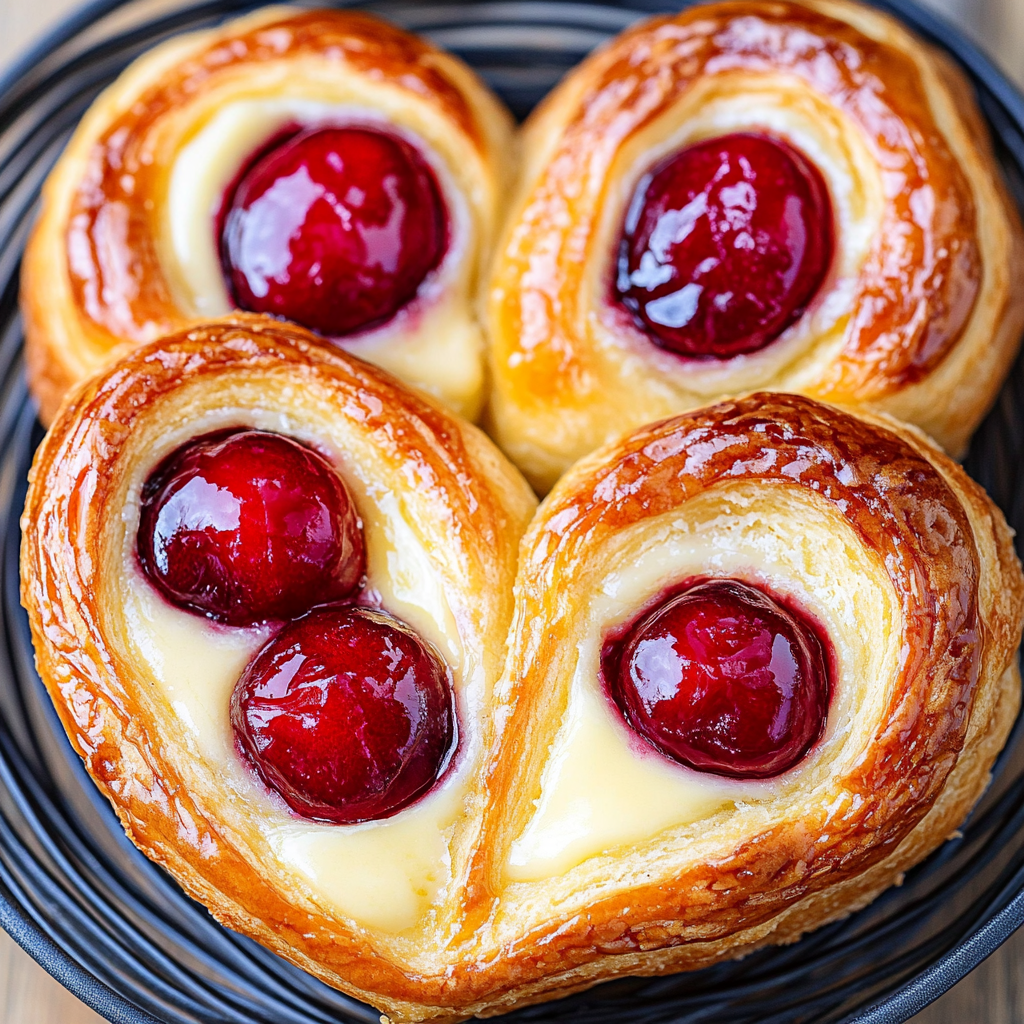
Imagine sinking your teeth into a warm, flaky pastry filled with creamy cheese and luscious cherries. The sweet aroma wafts through the air, wrapping you in a comforting embrace that feels like a hug from your grandma. That’s what a Cherry Cheese Danish does – it takes your taste buds on a delightful joyride that you didn’t even know you needed until now. Perfect for breakfast or an afternoon pick-me-up, this treat is bound to steal the show at any gathering or cozy morning at home.

Jump to:
- Ingredients for Cherry Cheese Danish
- REMEMBER
- How to Make Cherry Cheese Danish
- <strong>Perfecting the Cooking Process</strong>
- <strong>Add Your Touch</strong>
- <strong>Storing & Reheating</strong>
- FAQs:
- What ingredients do I need to make Cherry Cheese Danish?
- How do I store leftover Cherry Cheese Danish?
- Can I use fresh cherries instead of cherry pie filling?
- Is it possible to make Cherry Cheese Danish ahead of time?
- Conclusion for Cherry Cheese Danish:
- 📖 Recipe Card
Now, let me take you back to my childhood kitchen, where my mom would whip up these Cherry Cheese Danishes every weekend. I remember bouncing around the table like a kid on Christmas morning while waiting for them to come out of the oven. The anticipation was real! Every bite was a burst of happiness, and I couldn’t wait to recreate this magical experience in my own kitchen. Trust me when I say that this recipe will bring as much joy to your life as it did to mine!
Why You'll Love This Recipe
- This Cherry Cheese Danish is incredibly easy to prepare, making it perfect for busy mornings or spontaneous brunches.
- The sweet-tart cherry filling paired with creamy cheese delivers a flavor explosion in every bite.
- Its beautifully golden crust adds stunning visual appeal to your table setting, leaving everyone wondering how you made such a masterpiece.
- Versatile enough for any occasion, this treat can be enjoyed warm or cold and is perfect for sharing—or keeping all to yourself!
Ingredients for Cherry Cheese Danish
Here’s what you’ll need to make this delicious dish:
- Puff Pastry Sheets: Use store-bought puff pastry for convenience; it provides that flaky, buttery texture we all love without the hassle.
- Cream Cheese: Softened cream cheese is essential for that rich filling—make sure it’s at room temperature for easy mixing.
- Cherry Filling: You can use canned cherries or fresh ones; just ensure they are sweet and ripe for the best flavor.
- Sugar: Granulated sugar sweetens the filling perfectly—adjust according to your taste!
- Vanilla Extract: A splash of vanilla extract enhances the overall flavor profile; it’s like a secret ingredient whispering sweetness.
- Egg (for egg wash): An egg wash gives your pastry that beautiful golden finish when baked; don’t skip this step!
The full ingredients list, including measurements, is provided in the recipe card directly below.
How to Make Cherry Cheese Danish
Follow these simple steps to prepare this delicious dish:
Step 1: Preheat Your Oven
Preheat your oven to 400°F (200°C). While it warms up, line a baking sheet with parchment paper—this will make cleanup so much easier later!
Step 2: Prepare the Puff Pastry
Unroll the puff pastry sheets onto a lightly floured surface. Cut each sheet into squares (about four inches each side). You should see those lovely layers already starting to form!
Step 3: Make the Creamy Filling
In a bowl, mix softened cream cheese with sugar and vanilla extract until smooth and fluffy. This is where magic happens; just imagining it makes me want to dive right in!
Step 4: Assemble Your Danishes
Place about one tablespoon of cream cheese mixture in the center of each pastry square. Top with cherry filling—don’t be shy! Fold each corner of the pastry over the filling towards the center and pinch gently to seal.
Step 5: Brush with Egg Wash
Whisk together an egg in a small bowl and brush it over each danish. This step adds that gorgeous shine we all dream about when thinking of pastries fresh from the bakery.
Step 6: Bake Until Golden
Place your assembled danishes on the prepared baking sheet and bake for about 20-25 minutes or until golden brown and puffed up beautifully. The kitchen will smell heavenly during this time—prepare yourself for an aroma overload!
Transfer them onto plates once they’re cool enough not to burn your tongue (because who hasn’t done that?). Enjoy warm with coffee or tea—the perfect pairing for any day!
This Cherry Cheese Danish isn’t just a treat; it’s an experience meant to be savored! So go ahead, share some smiles (and pastries) with friends and family—or keep them all to yourself if you’re feeling particularly indulgent!
You Must Know
- This delightful Cherry Cheese Danish offers a burst of flavor and a touch of sweetness that will brighten any morning.
- The flaky pastry and creamy filling create an irresistible treat.
- Easy to make, it’s perfect for brunch or a cozy afternoon snack.
Perfecting the Cooking Process
Start by preheating your oven to 375°F (190°C) while you prepare the dough. Roll out the pastry, fill it with cream cheese and cherries, then fold and bake until golden. This sequence ensures everything cooks evenly for that perfect cherry cheese danish.
Add Your Touch
Feel free to swap the cherries for blueberries or raspberries if you prefer. You can also add lemon zest for a zesty kick or sprinkle powdered sugar on top for extra sweetness. Customize this treat to fit your taste buds!
Storing & Reheating
Store leftover Cherry Cheese Danish in an airtight container at room temperature for up to two days. Reheat in the oven at 350°F (175°C) for about 5-7 minutes to restore its flaky texture.
Chef's Helpful Tips
- To achieve that golden color, brush the pastry with egg wash before baking.
- Ensure your cream cheese is at room temperature for easy mixing.
- Consider using fresh fruit when possible for vibrant flavor.
I once made these Cherry Cheese Danishes for a brunch gathering, and they disappeared faster than I could say “pastry perfection.” Friends raved about them, and I felt like a baking superstar!
FAQs:
What ingredients do I need to make Cherry Cheese Danish?
To prepare a delicious Cherry Cheese Danish, gather the following ingredients: puff pastry sheets, cream cheese, granulated sugar, vanilla extract, cherry pie filling, and an egg for egg wash. For added flavor, consider using lemon zest or almond extract in the cheese filling. Ensure that your puff pastry is thawed and ready for rolling. This combination of ingredients creates a delightful pastry that complements the sweet cherries.
How do I store leftover Cherry Cheese Danish?
If you have leftover Cherry Cheese Danish, store it in an airtight container at room temperature for up to two days. For longer storage, refrigerate it for up to one week. When ready to enjoy again, you can reheat it in the oven at a low temperature to restore its flaky texture. Avoid microwaving it, as this may make the pastry soggy.
Can I use fresh cherries instead of cherry pie filling?
Yes, you can use fresh cherries to make your Cherry Cheese Danish! Simply pit and chop the cherries into small pieces. Cook them with a little sugar and cornstarch to create a thick cherry filling. This homemade filling will add a fresh taste to your danish and allow you to control the sweetness. Be sure to let it cool before adding it to the cheese mixture.
Is it possible to make Cherry Cheese Danish ahead of time?
Absolutely! You can prepare the components of your Cherry Cheese Danish ahead of time. Make the cheese filling and cherry filling in advance and refrigerate them separately. You can also assemble the danishes but leave them unbaked in the fridge for up to 24 hours before baking. This allows you to enjoy freshly baked pastries with minimal effort when you’re ready to serve them.
Conclusion for Cherry Cheese Danish:
In summary, making Cherry Cheese Danish is simple and rewarding. With easy-to-follow steps involving puff pastry, cream cheese, and cherry filling, this treat promises delightful flavors in every bite. Remember that you can customize your filling with fresh cherries or other fruits if desired. Storing leftovers properly ensures that you can savor this pastry even after it’s been baked. Enjoy creating this delicious dessert that will surely impress family and friends!
Did You Enjoy Making This Recipe? Please rate this recipe with ⭐⭐⭐⭐⭐ or leave a comment.
📖 Recipe Card
Print
Cherry Cheese Danish
- Total Time: 40 minutes
- Yield: Makes about 4 servings 1x
Description
Cherry Cheese Danish is a scrumptious pastry that combines flaky puff pastry with a creamy cheese filling and sweet cherry topping. Perfect for breakfast or a delightful afternoon snack, these danishes are simple to make and sure to impress your family and friends. Enjoy them warm alongside coffee or serve them at brunch—each bite delivers a nostalgic burst of flavor that transports you back to cherished moments in the kitchen.
Ingredients
- 1 sheet puff pastry (thawed)
- 8 oz cream cheese (softened)
- 1/4 cup granulated sugar
- 1 tsp vanilla extract
- 1/2 cup cherry pie filling (or fresh cherries)
- 1 egg (for egg wash)
Instructions
- Preheat oven to 400°F (200°C) and line a baking sheet with parchment paper.
- Roll out the puff pastry and cut it into 4-inch squares.
- In a bowl, mix cream cheese, sugar, and vanilla until smooth.
- Place 1 tablespoon of the cream cheese mixture in the center of each square, top with cherry filling. Fold corners over filling and pinch to seal.
- Brush each danish with beaten egg for a golden finish.
- Bake for 20-25 minutes until golden brown.
- Prep Time: 15 minutes
- Cook Time: 25 minutes
- Category: Dessert
- Method: Baking
- Cuisine: American
Nutrition
- Serving Size: 1 serving
- Calories: 220
- Sugar: 10g
- Sodium: 150mg
- Fat: 12g
- Saturated Fat: 7g
- Unsaturated Fat: 4g
- Trans Fat: 0g
- Carbohydrates: 24g
- Fiber: 1g
- Protein: 3g
- Cholesterol: 50mg